Quick Kitchen Makeovers: Paint Tips for a Fresh Look

BLOG POSTS Quick Kitchen Makeovers: Paint Tips for a Fresh Look Sponsored by: E&S Contractor Painting Company Your kitchen is the heart of your home, and giving it a fresh look doesn’t have to involve a complete renovation. With strategic paint choices and a few simple updates, you can transform your kitchen into a welcoming and stylish space. In this article, we’ll explore paint tips for a quick kitchen makeover that breathes new life into the heart of your home. 1. Cabinet Refinishing One of the most impactful changes you can make in your kitchen is refinishing your cabinets. Consider painting your cabinets in a fresh, neutral color to brighten the space and give it a modern feel. White or light gray cabinets are popular choices that create a clean and timeless look. 2. Contrast with Island Paint If you have a kitchen island, make it a focal point by painting it in a contrasting color. This adds visual interest and personality to the space. Bold colors like navy blue or deep green can make a striking statement against neutral cabinets. 3. Fresh Backsplash Consider updating your backsplash with a new coat of paint. Specialized tile paint or a fresh layer of grout can revitalize the backsplash area and give your kitchen a cleaner appearance. 4. Coordinated Walls Choose wall colors that coordinate with your cabinet and countertop choices. Soft, warm hues like pale beige, light gray, or soft blue can create a harmonious and inviting atmosphere. 5. Open Shelving If you have open shelves in your kitchen, paint the wall behind them in an accent color or a bold pattern. This can add a touch of drama and showcase your kitchen items as decorative elements. 6. Updated Hardware Replacing cabinet hardware, such as handles and knobs, with modern or vintage styles can instantly refresh the look of your cabinets and drawers. Choose finishes that complement your overall kitchen aesthetic. 7. Appliance Makeovers Special appliance paint can transform the look of your refrigerator, oven, or dishwasher. This cost-effective solution allows you to coordinate your appliances with your kitchen’s new color scheme. 8. Ceiling Details Don’t forget about the ceiling! Consider adding a fresh coat of paint to the ceiling for a clean and polished look. Light colors can make the space feel brighter and more open. 9. Crown Molding Adding crown molding to your kitchen can create an elegant and finished appearance. Paint it to match your cabinets or choose a contrasting color for a pop of sophistication. 10. Create a Focal Wall Select one wall in your kitchen as a focal point and paint it with a bold or textured finish. This can add depth and personality to the space, drawing the eye and creating visual interest. Conclusion A quick kitchen makeover with paint can breathe new life into your culinary space without the need for a full renovation. By refinishing cabinets, updating hardware, and choosing coordinated colors, you can achieve a fresh and inviting kitchen that reflects your style and personality. Enjoy the transformation and the renewed energy of your kitchen as you cook and gather with loved ones. CONTACT US NOW
Creating a Long-Term Design Plan with Paint
BLOG POSTS Creating a Long-Term Design Plan with Paint Sponsored by: E&S Contractor Painting Company Designing and decorating your home is an ongoing journey, and paint is one of the most versatile tools at your disposal. Whether you’re planning a complete home makeover or just looking to refresh certain spaces, creating a long-term design plan with paint can help you achieve your interior design goals gradually and efficiently. In this article, we’ll explore how to use paint strategically to transform your space over time. 1. Establish Your Design Vision Before you begin, establish a clear design vision for your home. Consider the overall style, color palette, and atmosphere you want to create. Are you aiming for a contemporary look, a classic feel, or something entirely unique? Having a design vision will guide your paint choices and help maintain consistency throughout your home. 2. Create a Priority List Make a list of the areas or rooms in your home that you’d like to update or transform with paint. Prioritize these spaces based on your preferences and needs. Start with the rooms that are most important to you or those that see the most traffic. 3. Choose Timeless Colors When selecting paint colors, opt for timeless and versatile hues. Neutral colors like whites, grays, beiges, and soft blues are excellent choices as they can adapt to various design styles and trends over the years. These colors serve as a reliable foundation for your long-term design plan. 4. Plan Phased Projects Instead of trying to tackle your entire home at once, plan phased painting projects. This approach allows you to focus on one room or area at a time, making the process more manageable and budget-friendly. Create a timeline that outlines when you intend to complete each project. 5. Coordinate Color Schemes Maintain cohesion in your home’s design by coordinating color schemes across rooms. Even if each space has its unique style and personality, using complementary or harmonious colors can create a sense of unity and flow. 6. Experiment with Accent Walls To add visual interest and a touch of personality, consider using accent walls strategically. These can serve as focal points in rooms and allow you to introduce bolder colors or patterns without overwhelming the entire space. 7. Incorporate Trends Thoughtfully While it’s fun to incorporate design trends, do so thoughtfully to ensure your space remains timeless. Consider using trendy colors or patterns for accents like throw pillows, artwork, or decor, rather than committing them to permanent fixtures like walls or furniture. 8. Keep Records Keep a record of the paint colors and finishes you’ve used in each room. This will be valuable for touch-ups and future reference as you continue to evolve your home’s design. 9. Seek Professional Advice When in doubt about color choices or design decisions, consult with a professional interior designer or a local painting contractor. They can offer expert guidance and help you achieve your long-term design goals effectively. 10. Embrace the Process Creating a long-term design plan with paint is a journey, not a destination. Embrace the process and enjoy watching your home transform gradually over time. Each painting project brings you one step closer to realizing your ultimate design vision. Conclusion Transforming your home’s design with paint is an exciting and rewarding endeavor. By creating a long-term design plan, you can gradually evolve your space to reflect your evolving tastes and preferences. With careful planning and strategic paint choices, your home will continue to be a canvas for your creativity and a reflection of your unique style for years to come. CONTACT US NOW
Transforming One Room at a Time: Painting Tips and Tricks

BLOG POSTS Transforming One Room at a Time: Painting Tips and Tricks Sponsored by: E&S Contractor Painting Company Embarking on a painting project to transform your living spaces can be an exciting endeavor. Whether you’re giving a room a fresh look or tackling a complete home makeover, the right painting techniques can make a world of difference. In this article, we’ll explore practical painting tips and tricks for achieving stunning results, one room at a time. 1. Prepare the Room Preparation is key to a successful painting project. Start by removing furniture and covering fixtures, floors, and anything else you want to protect from paint splatters. Take the time to repair any cracks, holes, or imperfections in the walls before you begin painting. 2. Use High-Quality Tools and Materials Invest in high-quality brushes, rollers, and paint. Quality tools and materials can result in a smoother finish and make the painting process more efficient. Don’t forget to choose the right type of paint for the surface you’re painting. 3. Prime Before You Paint Priming your walls before applying the topcoat is essential, especially if you’re painting over a dark color or a porous surface. Primer helps the paint adhere better and ensures a more even finish. It also covers stains and imperfections. 4. Cut-In First Before rolling on the main coat of paint, use a brush to “cut in” or paint the edges and corners of the walls. This creates a clean and precise line along the edges, making the job easier when you use a roller. 5. Work from Top to Bottom When using a roller, start at the top of the wall and work your way down in a “W” or “M” pattern. This helps distribute the paint evenly and avoids streaks or uneven coverage. 6. Take Breaks Painting can be physically demanding, so remember to take short breaks to rest and stretch. Staying refreshed will help you maintain focus and achieve a better result. 7. Keep Paint Consistency If you need to take a break during painting, make sure to cover your paint tray and brushes to prevent the paint from drying out or forming a skin. To maintain consistent color, mix all your paint cans into one large container before you start. 8. Double-Check for Drips As you go along, keep an eye out for drips or runs in the paint. If you notice any, smooth them out immediately to avoid uneven drying. 9. Use Proper Ventilation A well-ventilated room helps paint dry faster and minimizes exposure to fumes. Open windows and doors, or use fans to improve airflow. 10. Clean Up Carefully After completing your painting project, clean your brushes, rollers, and any other equipment thoroughly. Proper cleaning ensures they remain in good condition for future use. 11. Plan for Multiple Coats In many cases, especially with lighter colors or when covering dark hues, you may need to apply multiple coats of paint to achieve the desired look. Be prepared for this and plan your timeline accordingly. 12. Final Inspection Once the paint has dried completely, inspect the room for any touch-ups or areas that may need additional attention. Take your time to ensure a flawless finish. Conclusion Transforming your home one room at a time through painting is a rewarding process that can breathe new life into your living spaces. By following these practical tips and tricks, you can achieve professional-looking results and enjoy the satisfaction of a job well done. So, pick up your brushes, choose your colors, and start transforming your rooms into spaces that reflect your unique style and personality. CONTACT US NOW
Five Tips for Choosing the Right Gray for Your Home Exterior
BLOG POSTS Five Tips for Choosing the Right Gray for Your Home Exterior Sponsored by: E&S Contractor Painting Company Gray is a versatile and timeless color choice for home exteriors. Whether you’re aiming for a classic look or a more modern and sophisticated appearance, gray can provide the perfect backdrop for your home’s architecture and landscaping. However, with various shades of gray available, selecting the right one can be a challenge. In this article, we’ll provide you with five tips to help you choose the perfect gray for your home exterior. 1. Consider the Undertones Gray is not just one shade; it comes in a wide range of undertones, including cool, warm, and neutral. Understanding the undertones is crucial because they can dramatically influence how the color appears on your home. Cool Gray: These grays have blue or green undertones and can create a modern and crisp look. They work well with homes featuring clean lines and contemporary design. Warm Gray: Gray with warm undertones, such as beige or taupe, can provide a cozier and more traditional appearance. They pair nicely with homes that have natural materials like stone or wood. Neutral Gray: Gray with neutral undertones is a safe choice that can work with a variety of architectural styles. It’s a good option if you want a balanced and versatile look. 2. Test Samples in Natural Light Always test paint samples on a small section of your home’s exterior and observe how they look in different lighting conditions. Natural light can significantly affect the appearance of gray. What looks perfect in bright sunlight might appear quite different in the shade or during overcast days. Take your time to evaluate how the color appears throughout the day. 3. Consider the Surroundings The color of your home should harmonize with the surrounding landscape, neighboring houses, and the overall character of your neighborhood. Take into account elements like trees, plants, and any fixed features like stone or brick. A well-chosen gray can enhance the overall curb appeal of your home and complement the environment. 4. Test with Complementary Colors Gray can pair beautifully with other colors, and you should consider how it will interact with your home’s trim, doors, and accents. White, black, navy blue, and even muted pastels can create stunning combinations with gray. Test these combinations to find the one that best suits your taste and enhances your home’s exterior. 5. Get Professional Advice Choosing the right gray for your home exterior is a significant decision, and it’s often helpful to seek advice from professionals. Consult with a local painting contractor or an experienced color consultant. They can provide valuable insights, share their expertise, and even provide digital renderings to help you visualize how different shades of gray will look on your home. Conclusion Choosing the perfect gray for your home exterior requires careful consideration of undertones, lighting, surroundings, complementary colors, and professional advice. With the right shade of gray, your home can achieve a timeless and elegant appearance that stands out in your neighborhood. So, take your time, test samples, and enjoy the process of transforming your home with the beauty of gray. CONTACT US NOW
Rejuvenate Your Home with Fresh, New Paint Colors
BLOG POSTS Rejuvenate Your Home with Fresh, New Paint Colors Sponsored by: E&S Contractor Painting Company Your home is a reflection of your personality and style, and one of the most effective ways to breathe new life into your living spaces is by applying a fresh coat of paint. The right paint colors can rejuvenate your home, making it feel vibrant, inviting, and up-to-date. In this article, we will explore how to revitalize your living spaces with fresh, new paint colors. Assessing the Current State Before diving into a painting project, it’s important to assess the current state of your home’s interior and exterior. Take a close look at the existing colors, the condition of the paint, and any areas that might need special attention, such as peeling or chipping paint, cracks, or water damage. This assessment will help you plan your painting project effectively. Selecting a Color Palette Choosing the right color palette is the heart of any successful painting project. Consider the following tips when selecting fresh, new paint colors: 1. Personal Style: Think about your personal style and the atmosphere you want to create. Do you prefer serene and calming colors, or are you drawn to bold and vibrant shades? 2. Room Functionality: Keep in mind the function of each room. Bedrooms may benefit from soothing colors, while the kitchen or dining area might benefit from lively and energetic hues. 3. Color Trends: While it’s essential to choose colors that resonate with you, it’s also worth exploring current color trends for inspiration. 4. Lighting Conditions: Take into account the natural and artificial lighting in each room. Different lighting can affect how colors appear. 5. Samples and Testing: Always test paint samples on your walls to see how they look in your space before making a final decision. Interior and Exterior Paint Consider whether you’ll be painting the interior, exterior, or both. Interior and exterior paints have different properties to withstand varying conditions. Exterior paint, for example, is formulated to withstand weather elements, while interior paint focuses more on aesthetics and ease of cleaning. DIY or Professional Help Decide whether you’ll tackle the painting project yourself or hire professionals. DIY painting can be a rewarding experience, but it requires time, effort, and some expertise. Hiring professional painters ensures a high-quality finish and saves you the hassle of doing the work yourself. Preparing Your Space Proper preparation is key to a successful painting project. Clear the room of furniture and cover floors and fixtures to protect them from paint splatter. Repair any damaged surfaces, sand rough areas, and clean the walls thoroughly before painting. The Painting Process Follow these steps during the painting process: 1. Prime: Applying a primer helps the paint adhere better and provides a smooth surface for the topcoat. 2. Paint: Use high-quality brushes and rollers to ensure an even application of paint. Apply the paint evenly, and use multiple coats if necessary. 3. Allow to Dry: Allow the paint to dry completely between coats and before moving furniture back into the room. Finishing Touches Once the paint has dried, it’s time for the finishing touches. Reinstall fixtures, replace outlet covers, and add any decorative elements that enhance the new color scheme. Conclusion Rejuvenating your home with fresh, new paint colors is a fantastic way to transform your living spaces and breathe new life into your surroundings. Whether you’re looking to update a single room or give your entire home a makeover, careful planning, color selection, and proper execution can make a world of difference. So, don’t hesitate to embark on this creative journey and watch as your home becomes a reflection of your style and personality. CONTACT US NOW
Finding Color Confidence: How to Choose the Right Palette
BLOG POSTS Finding Color Confidence: How to Choose the Right Palette Choosing the right colors for your home can be a daunting task. With countless shades, tones, and hues to choose from, it’s easy to feel overwhelmed. However, finding the perfect color palette for your space doesn’t have to be a stressful experience. In this article, we will explore how to find color confidence and select the right palette to rejuvenate your home with fresh, new paint colors. Sherwin-Williams Visualizer The Importance of Color in Your Home Color is one of the most powerful elements in interior design. It has the ability to influence mood, perception, and even the perception of space. When you choose the right colors for your home, you can create a harmonious and inviting atmosphere that reflects your personal style and taste. Step 1: Determine Your Style Before you start selecting paint colors, take some time to determine your style. Are you drawn to a more traditional, classic look, or do you prefer a modern and contemporary vibe? Understanding your style preferences will help narrow down your color choices. Step 2: Consider the Mood Think about the mood you want to create in each room. For example, if you want your living room to feel cozy and relaxing, warm and earthy tones like soft beige or muted green may be suitable. If you’re aiming for a vibrant and energetic kitchen, consider bright and lively colors like red or yellow. Step 3: Test Samples Once you have a general idea of the colors you’d like to use, it’s crucial to test samples in your actual space. Paint samples on a small section of the wall and observe how they look in different lighting conditions throughout the day. This step can save you from making a color choice you might regret later. Step 4: Create a Cohesive Flow While each room can have its own color scheme, it’s essential to ensure that there is a cohesive flow throughout your home. Choose a unifying element, such as a particular color or undertone, to tie all the spaces together. This will create a sense of continuity and balance. Step 5: Seek Inspiration If you’re still unsure about your color choices, seek inspiration from various sources. Look at interior design magazines, websites, and social media platforms like Pinterest and Instagram. Seeing how colors are used in professionally designed spaces can spark ideas and help you gain confidence in your selections. Additional Tips for Finding Color Confidence Don’t rush the decision-making process. Take your time to explore different options and live with paint samples for a few days before making a final choice. Consider the existing elements in your space, such as furniture, flooring, and decor. Your paint colors should complement these elements. Remember that paint can have different finishes, from matte to glossy. The finish you choose can affect the overall look and feel of a room. Don’t be afraid to consult with a professional interior designer or a local painting contractor. They can offer valuable insights and recommendations based on their expertise. Keep in mind that trends come and go. While it’s okay to incorporate trendy colors, make sure they align with your personal style and the overall design of your home. Conclusion Choosing the right color palette for your home is an exciting opportunity to express your personality and create a space that truly feels like your own. By following these steps and trusting your instincts, you can find color confidence and transform your living spaces with fresh, new paint colors. Remember that the process should be enjoyable, and the end result will be a home that reflects your unique style and taste. Happy painting! CONTACT US NOW
Choosing Living Room Paint Colors for an Energized Atmosphere
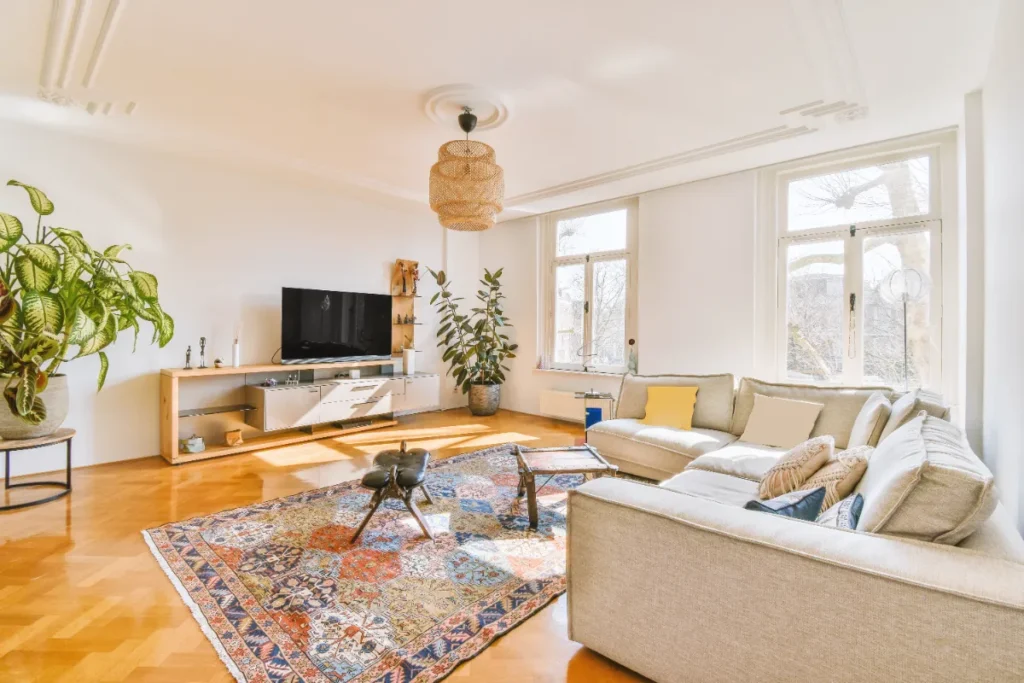
BLOG POSTS Choosing Living Room Paint Colors for an Energized Atmosphere Hey there! Are you looking to give your living room a fresh, energized vibe? Great choice! The living room is where life happens – it’s where we entertain guests, cuddle up for movie nights, or just relax after a long day. The right paint color can totally transform this space, not just visually, but emotionally too. In this friendly chat, we’re going to explore some awesome ideas for choosing living room paint colors that will infuse energy and positivity into your home. So, grab a cup of your favorite beverage, and let’s dive in! Understanding Color Psychology Before we pick out colors, let’s talk a bit about color psychology. Colors have this amazing ability to affect our mood. For instance, warm colors like reds and oranges can be invigorating and lively, while cool colors like blues and greens are more calming. When we’re aiming for an energized atmosphere, we want colors that uplift and invigorate without overwhelming. 1. Sunny Yellows for a Cheerful Vibe Let’s start with sunny yellows. Think of the warmth and brightness of a sunny day – yellow brings that cheerfulness into your living room. It’s a color that radiates positivity and can instantly lift the mood of the room. You don’t have to go all out – even a single yellow accent wall can make a huge difference. 2. Vibrant Oranges for a Burst of Energy Orange is a wonderfully vibrant color that’s full of life. It’s perfect for creating a lively and inviting space. Imagine a shade that combines the warmth of a cozy fire with the joy of a sunset – that’s the magic of orange. Pair it with neutral furnishings to let the color really pop. 3. Refreshing Greens for a Natural Touch Green is the color of nature, and it brings a refreshing and rejuvenating vibe to any space. A zesty lime green or a bright apple green can be particularly energizing. These shades work great when you want to create a connection with nature and foster a sense of renewal and growth. 4. Bold Reds for a Dynamic Feel Red is a powerful color, known for its ability to energize and excite. A deep, bold red can make your living room feel dynamic and lively. It’s a great choice for social spaces where you want to stimulate conversation and interaction. Just be mindful to balance it with softer hues to avoid it becoming too intense. 5. Playful Purples for Creativity Purple, especially in its brighter tones like lavender or violet, can bring a playful and creative energy to your living room. It’s a color that encourages imagination and can add a unique and personal touch to your space. Purple works beautifully with greys and whites for a modern, chic look. 6. Sky Blues for an Uplifting Atmosphere Blue might be known for its calming properties, but the right shade of blue can be incredibly uplifting. Think sky blue on a clear day – it’s refreshing, airy, and just makes you feel good. It’s also a versatile color that pairs well with a range of other hues. 7. Warm Neutrals for a Cozy Base If you’re a bit hesitant about going too bold, warm neutrals like creamy whites, soft beiges, or light browns can be a perfect base. These colors create a cozy and inviting backdrop that can be energized with colorful accents in pillows, art, or decor. 8. Metallic Accents for a Touch of Glamour Adding metallic accents in gold, silver, or bronze can bring an unexpected spark of energy to your living room. Whether it’s a metallic paint trim or decor items, these shiny elements can add a touch of glamour and vivacity to the space. 9. Two-Tone Combinations for Contrast Don’t be afraid to play with two-tone combinations. Pairing a vibrant color with a more subdued tone can create a striking contrast that’s both energetic and balanced. For example, a bright teal with a soft grey can create a lively yet harmonious look. 10. Textured Paints for a Tactile Experience Texture can add a whole new dimension to your living room. Textured paints or techniques like sponging and rag rolling can add depth and character to your walls, making the room feel dynamic and engaging. Conclusion Painting your living room is an opportunity to express your style and create a space that reflects your personality. Whether you prefer bold and bright colors, sophisticated monochromes, or calming pastels, there’s a palette to suit every taste. Remember to consider the mood you want to create, the natural light in the room, and the overall style of your home. With the right color and a bit of creativity, you can transform your living room into a vibrant and inviting space that you and your loved ones will enjoy for years to come. CONTACT US NOW
Transform Your Space: Removing Wallpaper for a Fresh Paint Job
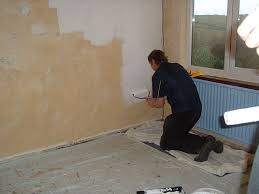
BLOG POSTS Transform Your Space: Removing Wallpaper for a Fresh Paint Job Wallpaper has been a staple in home decor for centuries, but tastes and trends change. Perhaps you’ve moved into a new home adorned with wallpaper that doesn’t fit your style, or maybe your current wallpaper has seen better days. Whatever the reason, removing wallpaper is the first step towards a fresh, new look for your space. This comprehensive 2500-word guide will walk you through the process of wallpaper removal, from the tools you’ll need to the finishing touches of a fresh paint job, ensuring your walls are transformed beautifully and effectively. Understanding Wallpaper Removal Wallpaper removal can be a daunting task, especially if the wallpaper has been on the walls for a long time. The process varies depending on the type of wallpaper and how it was installed. Some wallpapers are strippable, meaning they can be peeled off easily, while others may be more stubborn. It’s crucial to approach this task with patience and the right tools to avoid damaging your walls. Tools and Materials Needed Wallpaper Scorer: To perforate the wallpaper, allowing the stripping solution to penetrate. Stripping Solution: Commercially available or a homemade mixture of hot water and vinegar or fabric softener. Spray Bottle or Garden Sprayer: For applying the stripping solution. Putty Knife or Scraper: To gently remove the wallpaper. Drop Cloths: To protect your floors. Ladder: For reaching high places. Sponge and Bucket: For cleaning the walls afterward. Sandpaper: To smooth the walls. Primer and Paint: For the new paint job. Preparing the Room Before starting, remove all furniture from the room or move it to the center and cover it with drop cloths. Protect your floors with drop cloths as well. Turn off the electricity in the room and remove electrical outlet covers. This preparation ensures a safe and clean working environment. Assessing the Wallpaper Examine the type of wallpaper and how it’s adhered to the wall. Start by trying to peel it off from a corner or seam. If it comes off easily and doesn’t leave residue, you’re in luck – your wallpaper is strippable. If not, you’ll have to use a stripping solution to remove it. Scoring the Wallpaper If the wallpaper is not strippable, use a wallpaper scorer to make small holes in the paper. This step is crucial as it allows the stripping solution to penetrate through the wallpaper to the adhesive underneath. Applying the Stripping Solution Mix your stripping solution and apply it liberally to the wallpaper using a spray bottle or garden sprayer. Allow it to soak in for several minutes. The solution will soften the adhesive, making it easier to scrape off the wallpaper. Scraping the Wallpaper Once the solution has soaked in, use a putty knife or scraper to gently peel away the wallpaper. Start from the edges or seams and be careful not to gouge the drywall beneath. This step requires patience and a gentle hand. Cleaning and Repairing the Walls After removing the wallpaper, there might be adhesive residue left on the walls. Clean this off with a sponge and warm, soapy water. Once the walls are clean, you may notice imperfections like dents or small holes. Use spackle to fill these in and sand the walls smooth once the spackle dries. Priming the Walls Before painting, apply a coat of primer to the walls. Primer helps cover any leftover adhesive residue and ensures a smooth, even base for your new paint. It also helps the paint adhere better to the wall. Choosing Your Paint Selecting the right paint is crucial for your newly bare walls. Consider the room’s function and the mood you want to create when choosing a color. Use a high-quality paint for better coverage and durability. Painting Techniques When painting, start from the top of the wall and work your way down. Use a brush for corners and edges and a roller for the main wall areas. Apply at least two coats for even coverage, allowing the paint to dry thoroughly between coats. The Finishing Touches Once the paint is dry, you can add the finishing touches. This might include installing new molding, updating electrical outlet covers, or adding new decor to complement your fresh paint job. Maintenance and Care To maintain your newly painted walls, clean them regularly with a soft, damp cloth. Avoid harsh chemicals or abrasive materials that can damage the paint. Conclusion Removing wallpaper and applying a fresh coat of paint can completely transform a room. While it can be a time-consuming process, the end result is often worth the effort. With patience, the right tools, and a bit of elbow grease, you can turn an outdated space into something modern, fresh, and entirely your own. Your newly painted walls will not only reflect your personal style but also add value and appeal to your home. CONTACT US NOW