Avoid Common Mistakes in Interior Painting
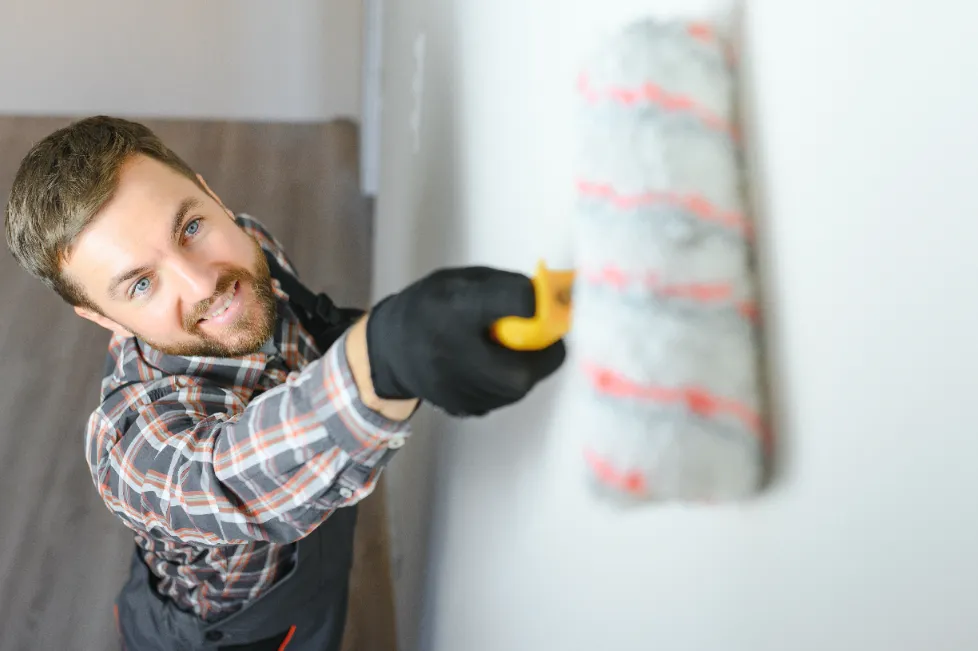
BLOG POSTS Avoid Common Mistakes in Interior Painting “A paint roller on the floor with paint bucket being ready.” Embarking on an interior painting project can invigorate your home’s aesthetics, making each room feel fresh and new. However, the difference between professional-looking results and disappointing mistakes often comes down to common missteps many homeowners make. Here’s how to avoid these pitfalls and ensure a flawless finish to your interior painting efforts. Interior Painting Preparation: The Foundation of Success Start with a Clean Slate One of the most critical steps in interior painting is starting with a properly prepared surface. Failing to clean walls can lead to paint peeling off or not adhering correctly. Wash walls with a mild detergent and patch any holes or cracks with spackle. Once dry, sand the patches smooth to create an even surface. Choosing the Right Primer Another common oversight is skipping the primer. Primer not only helps cover stains and dark colors but also enhances paint adhesion, prolonging your paint job’s life. Investing in a mold-resistant primer for areas with high humidity, like kitchens and bathrooms, can prevent future problems. Techniques for Better Interior Painting Master the Brush and Roller A frequent mistake is overloading the brush or roller with paint. This leads to drips and uneven application. Dip only a third of the brush into the paint, tapping off excess before applying. When using a roller, roll it back into the tray several times to ensure it’s evenly coated but not saturated. “A close-up of the hand pf the painter holding two paint rollers.” Maintain Consistency with a Wet Edge Always keep a wet edge to avoid lap marks. This means each stroke of your roller or brush should slightly overlap the previous before the paint dries. It’s also important to plan your painting strategy, working systematically from one side of the room to the other. Perfecting Your Interior Painting Technique Using Tapes and Shields Taping off trim, windows, and doors is essential for sharp, clean edges. Ensure the tape is firmly pressed down to prevent paint from bleeding underneath. Similarly, drop cloths and plastic sheeting should be laid down to protect floors and furniture from spills and splatters. Choose the Correct Paint Sheen The finish of your paint can greatly impact the room’s appearance and functionality. High-traffic areas benefit from satin or semi-gloss finishes, which are easier to clean. Conversely, matte finishes are better for lower-traffic areas as they hide imperfections better but are more challenging to clean. “The paint service worker carefully painting the wall with matte finish.” Final Touches and Curing Inspect and Touch Up After the main application, inspect your work. Use a small brush to touch up any spots you may have missed or where coverage is uneven. Allow the paint to dry completely according to the manufacturer’s instructions before moving furniture back or hanging decorations. Let It Cure It is crucial to understand that paint needs time to cure. While it may feel dry to the touch within hours, paint can take several weeks to harden fully. Avoid washing or scrubbing new paint until it has fully cured. Achieve Professional Results in Interior Painting By avoiding these common mistakes, your interior painting project will not only enhance the beauty of your home but also ensure durability and longevity. Whether refreshing a single room or revamping your entire house, proper techniques and preparations are key to flawless results. Transform your home with confidence! For more interior painting tips or to consult with a professional, visit our E&S Contractor Painting Company Inc blog or contact us today. We’re here to help you achieve the perfect finish for your interior painting project. CONTACT US NOW
Managing National Commercial Painting Projects: A Guide

BLOG POSTS Managing National Commercial Painting Projects: A Guide Sponsored by: E&S Contractor Painting Company National commercial painting projects are complex endeavors that require careful planning, coordination, and execution. Whether you’re a business owner looking to refresh multiple locations or a project manager overseeing a nationwide commercial painting initiative, effective management is key to success. In this article, we’ll provide a comprehensive guide for managing national commercial painting projects. 1. Define Project Scope and Objectives Begin by clearly defining the scope and objectives of the painting project. Determine the number of locations to be painted, the desired timeline, budget constraints, and specific requirements for each site. Document these details in a project scope statement to serve as a reference throughout the project. 2. Site Assessment and Inventory Conduct a thorough site assessment of each location to be painted. Create an inventory of the following: Surface conditions and repairs needed Types of paint and finishes required Special considerations, such as environmental regulations or historical preservation requirements Access and safety requirements 3. Budget Planning Develop a comprehensive budget that includes all project-related costs, such as paint, labor, equipment rental, safety measures, and any additional services like scaffolding or power washing. Allocate budget resources for contingencies to account for unexpected expenses. 4. Select a Qualified Painting Contractor Choose a reputable national painting contractor with experience in managing large-scale projects. Ensure they have the necessary licenses, insurance, and a track record of successful commercial painting projects. Request and evaluate bids from multiple contractors to make an informed decision. 5. Project Schedule and Timeline Create a detailed project schedule that outlines the start and end dates for each location. Consider factors like weather conditions, site-specific challenges, and any required permits. A well-structured timeline ensures that the project stays on track and within budget. 6. Materials and Paint Selection Select high-quality paints and materials suitable for commercial use and longevity. Consider factors like weather resistance, durability, and environmental impact when choosing paints. Ensure that the selected materials align with the project’s objectives and requirements. 7. Regulatory Compliance Understand and comply with local, state, and federal regulations related to commercial painting, including environmental regulations, safety standards, and permits. Failure to comply can lead to costly delays and fines. 8. Safety Measures Prioritize safety throughout the project. Implement safety measures, provide necessary training, and ensure that all contractors and workers adhere to safety protocols. Regular safety inspections and audits should be conducted. 9. Quality Control Establish a robust quality control process to monitor the progress and quality of work at each location. Inspections and assessments should be conducted regularly to identify and address any issues promptly. 10. Communication and Reporting Maintain open and transparent communication with all stakeholders, including contractors, site managers, and project teams. Regular progress reports should be provided to keep everyone informed about the project’s status. 11. Project Documentation Keep thorough records of all project-related documents, including contracts, permits, change orders, invoices, and inspection reports. Proper documentation helps with accountability, dispute resolution, and future reference. 12. Post-Project Evaluation After completing the project, conduct a post-project evaluation to assess the outcomes, identify lessons learned, and gather feedback from stakeholders. Use this information to improve future national commercial painting projects. Conclusion Managing national commercial painting projects requires meticulous planning, attention to detail, and effective communication. By following this comprehensive guide, you can ensure that your project is executed successfully, on time, and within budget. With the right strategies and a dedicated team, you can transform the appearance of multiple commercial locations and create a positive impression for customers and clients. CONTACT US NOW
Paint Trends for Travelers: Bringing the World into Your Home
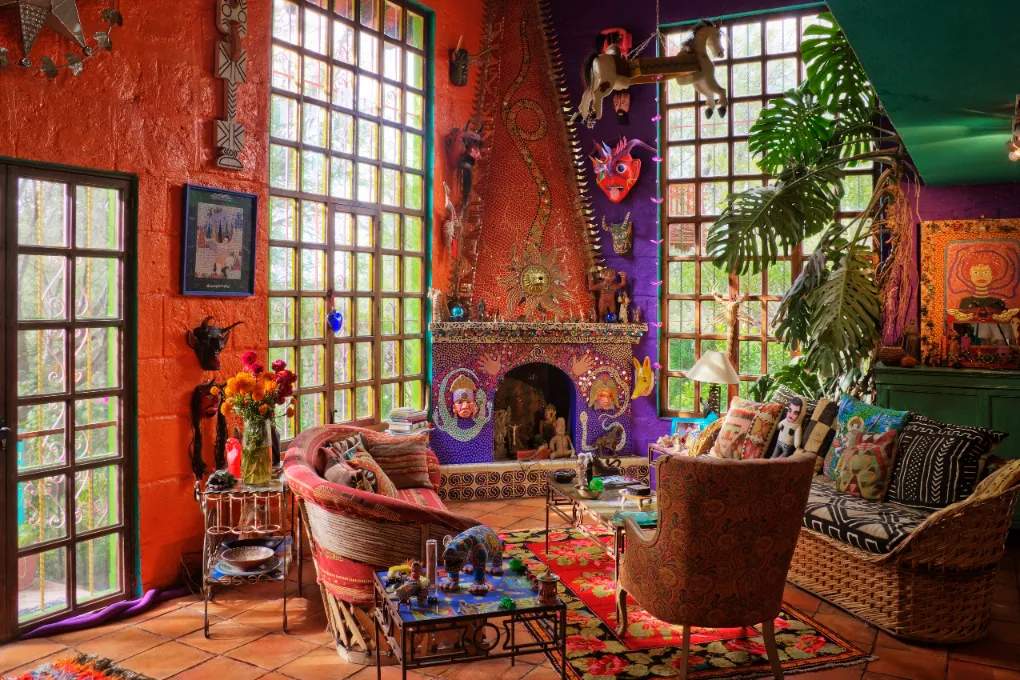
BLOG POSTS Paint Trends for Travelers: Bringing the World into Your Home Sponsored by: E&S Contractor Painting Company For avid travelers and adventure enthusiasts, the desire to bring the beauty of the world into their homes is a common aspiration. One way to achieve this is through interior design and paint choices that reflect the cultures, landscapes, and experiences encountered during their journeys. In this article, we’ll explore the latest paint trends that allow travelers to infuse their homes with the spirit of global exploration. 1. Earthy and Natural Tones Travelers often find inspiration in the natural world, from lush rainforests to arid deserts. Embrace earthy and natural paint colors like warm terracotta’s, sandy beiges, forest greens, and serene blues. These hues evoke the colors of the outdoors and create a soothing and grounding atmosphere in your home. 2. Global Influences Incorporate global influences into your home’s design by selecting paint colors inspired by specific regions or cultures. For example, choose Moroccan-inspired colors like deep blues and rich oranges for a bohemian feel, or opt for serene Scandinavian whites and grays for a minimalist Nordic look. 3. Travel-Themed Accent Walls Create travel-themed accent walls that tell the story of your adventures. Consider using wallpaper or stencils to depict maps, world landmarks, or travel quotes. This personalized touch can make your space feel like a traveler’s haven. 4. Vintage Maps Decorate your walls with vintage maps or create a custom mural showcasing your favorite destinations. Maps can serve as both decor and a reminder of past adventures and future travel dreams. 5. Artisanal and Handcrafted Colors Choose artisanal and handcrafted paint colors that reflect the craftsmanship and traditions of the places you’ve visited. Look for paints with unique textures and finishes that add depth and character to your walls. 6. Travel Souvenirs as Decor Incorporate travel souvenirs, such as textiles, artwork, or pottery, into your home’s decor. Coordinate paint colors with these souvenirs to create a cohesive and globally inspired look. 7. Nature-Inspired Murals Consider nature-inspired murals that transport you to your favorite outdoor destinations. From serene beach scenes to majestic mountain vistas, murals can transform your walls into breathtaking landscapes. 8. Textured Walls Experiment with textured paint or finishes to mimic the tactile qualities of materials you’ve encountered during your travels. Whether it’s the rough texture of a stone wall or the smoothness of a seashell, textured walls can evoke memories of your journeys. 9. Travel Photography Galleries Create galleries of your travel photography to adorn your walls. Frame and display your favorite travel photos, allowing them to serve as both decoration and a source of inspiration. 10. Personalized Color Palettes Design personalized color palettes for each room based on the emotions and memories associated with your travel experiences. Create a bedroom that feels like a serene retreat and a dining room that captures the vibrancy of street markets in distant lands. Conclusion Bringing the world into your home through paint and design choices is a wonderful way to celebrate your love of travel and exploration. Whether you draw inspiration from natural landscapes, cultural influences, or travel mementos, your home can become a reflection of your global adventures. Infuse your living space with the beauty and diversity of the world, and let it inspire you to embark on new journeys and create lasting memories. CONTACT US NOW
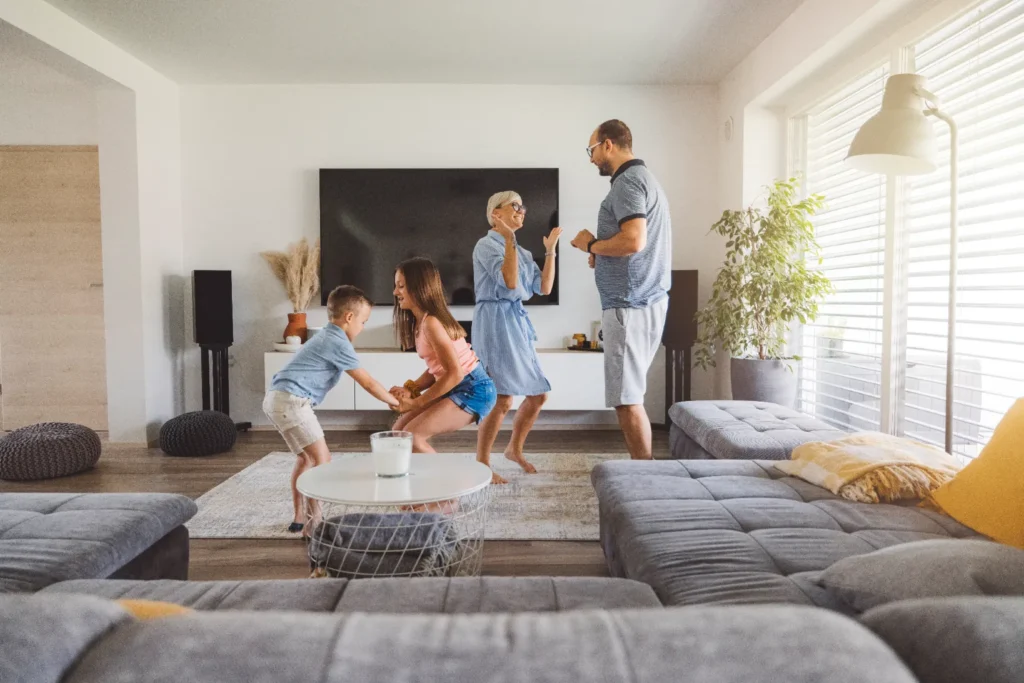
Avoiding the Six Biggest Mistakes in Living Room Painting
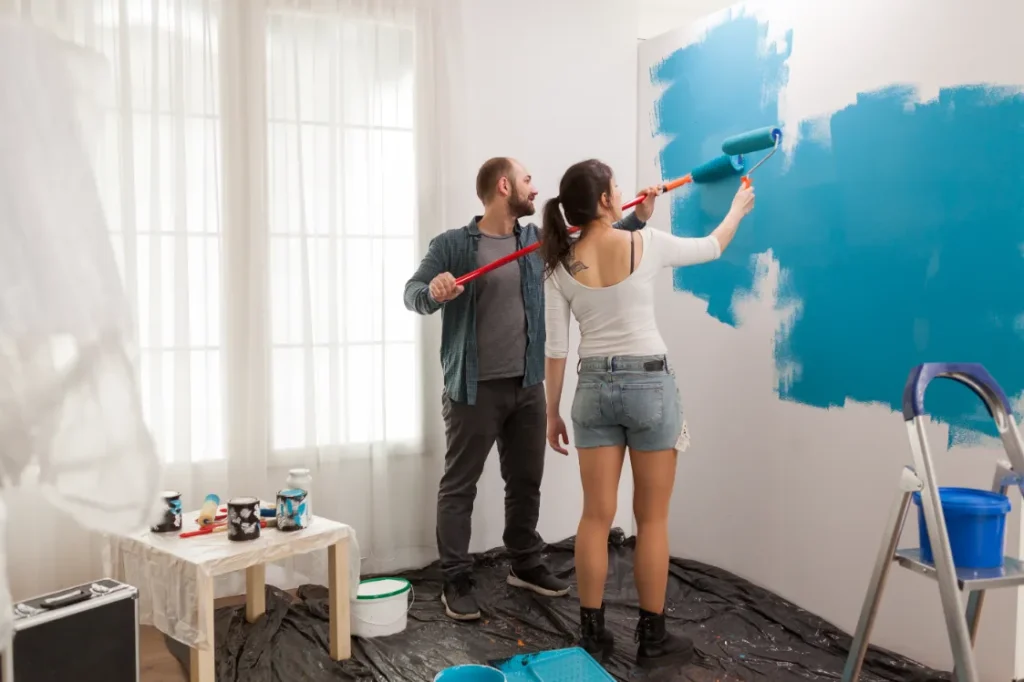
BLOG POSTS Avoiding the Six Biggest Mistakes in Living Room Painting Sponsored by: E&S Contractor Painting Company Transforming your living room with a fresh coat of paint is an exciting home improvement project. However, it’s essential to approach it with careful planning and attention to detail to achieve the best results. In this article, we’ll explore six of the biggest mistakes to avoid when painting your living room, ensuring a successful and satisfying outcome. 1. Skipping Proper Preparation Mistake: Neglecting the necessary preparation work before painting. Solution: Always begin with proper preparation. Clean the walls to remove dirt, dust, and grease. Patch any holes or cracks, and sand the surface for a smooth finish. Use painter’s tape to protect trim, baseboards, and fixtures. 2. Choosing the Wrong Paint Color Mistake: Selecting a paint color without considering lighting and room size. Solution: Test paint samples on the wall to see how they appear in different lighting conditions. Take into account the size of your living room; dark colors can make a small room feel even smaller, while light colors can create a sense of space. 3. Inadequate Coverage Mistake: Trying to save money by skimping on the amount of paint used. Solution: Ensure adequate paint coverage by calculating the square footage of your living room and purchasing enough paint accordingly. It’s better to have extra paint for touch-ups than to run out mid-project. 4. Ignoring Primer Mistake: Skipping the use of primer, especially when painting over dark or uneven surfaces. Solution: Apply a primer coat before painting, as it helps the paint adhere better, provides a uniform surface, and covers stains or imperfections. Primer is essential for achieving a professional finish. 5. Rushing the Process Mistake: Trying to complete the project too quickly. Solution: Painting requires patience. Allow sufficient drying time between coats as per the paint manufacturer’s instructions. Rushing can lead to uneven finishes, drips, or smudges that are difficult to correct. 6. Neglecting Proper Ventilation Mistake: Painting in a poorly ventilated space. Solution: Ensure good ventilation by opening windows and doors or using fans while painting. Proper ventilation speeds up drying and helps dissipate paint fumes, creating a healthier environment. Conclusion Avoiding these common mistakes can make your living room painting project a smooth and successful endeavor. Proper preparation, color selection, and attention to detail are key to achieving the results you desire. Take your time, follow best practices, and enjoy the process of transforming your living space into a welcoming and refreshed area for relaxation and entertainment. CONTACT US NOW
Boosting Your Home’s Cool-Weather Curb Appeal with Paint
BLOG POSTS Boosting Your Home’s Cool-Weather Curb Appeal with Paint Sponsored by: E&S Contractor Painting Company As the seasons change and cool weather approaches, it’s the perfect time to enhance your home’s curb appeal with a fresh coat of paint. Whether you’re planning to sell your home or simply want to enjoy a more welcoming exterior, painting can make a significant difference. In this article, we’ll explore how to boost your home’s cool-weather curb appeal with strategic paint choices. 1. Choose Cozy Colors For a warm and inviting look during the cooler months, opt for cozy and rich paint colors. Earthy tones like warm browns, deep reds, or olive greens can create a welcoming atmosphere that complements the season. 2. Highlight Architectural Features Use paint to highlight and accentuate your home’s architectural features. For example, consider painting the front door, window trim, or shutters in a contrasting color that stands out against the main exterior. This draws attention to the unique elements of your home. 3. Update the Front Door The front door is a focal point of your home’s exterior. Consider giving it a fresh coat of paint in a bold and inviting color. Reds, blues, and greens are popular choices for front doors and can add a touch of personality to your home. 4. Refresh the Trim Painting the trim around windows, eaves, and other architectural details can make a substantial difference in the overall appearance of your home. Crisp white or off-white trim can create a clean and timeless look. 5. Address Exterior Repairs Before painting, inspect your home’s exterior for any necessary repairs. Fixing cracks, peeling paint, or damaged siding ensures a smooth and polished finish. It also prevents further deterioration during the winter months. 6. Consider a Faux Finish For a unique and eye-catching curb appeal, consider using faux finishes or techniques such as brick or stone patterns. These faux finishes can mimic the appearance of expensive materials and add character to your home’s exterior. 7. Update Outdoor Fixtures To complement your new paint job, update outdoor fixtures like light fixtures, house numbers, and mailbox with finishes that coordinate with your home’s color scheme. These small details can make a big difference. 8. Seasonal Decor Embrace the cool-weather season by incorporating seasonal decor. Adding wreaths, pumpkins, or other autumn-themed decorations to your freshly painted exterior can enhance your home’s curb appeal during the fall. 9. Maintain Landscaping Trimming bushes, cleaning up leaves, and maintaining your landscaping can further enhance your home’s curb appeal. Well-kept greenery complements your paint job and adds vibrancy to the overall look. 10. Professional Assistance For a flawless and long-lasting paint job, consider hiring a professional painting contractor. They have the expertise, tools, and experience to ensure that your home’s exterior looks its best. Conclusion Boosting your home’s cool-weather curb appeal with paint is a rewarding project that can enhance your home’s beauty and charm. By selecting cozy colors, highlighting architectural features, and paying attention to details, you can create a welcoming exterior that you’ll enjoy throughout the season and beyond. CONTACT US NOW
Freshening Up Your College-Bound Kid’s Room
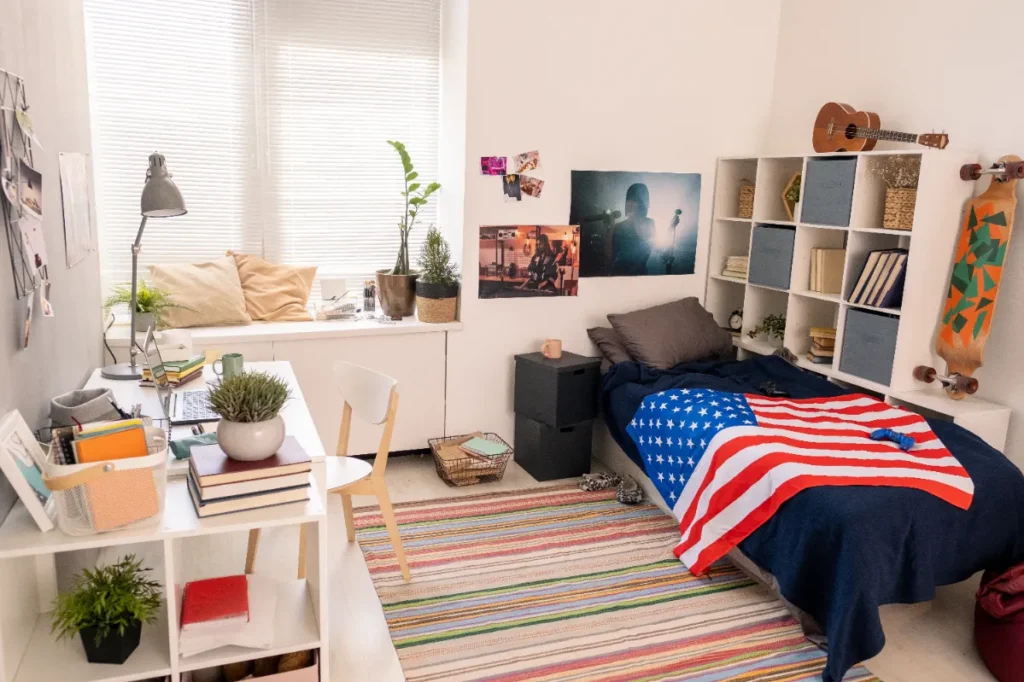
BLOG POSTS Freshening Up Your College-Bound Kid’s Room Sponsored by: E&S Contractor Painting Company Sending your child off to college is a significant milestone, and it often comes with a mix of emotions. While they embark on a new chapter in their life, you can make the transition easier by freshening up their room with a new look. In this article, we’ll explore how to transform your college-bound kid’s room with paint to create a space that reflects their evolving tastes and provides a warm welcome when they return home. 1. Involve Your Child Before you begin the transformation, involve your child in the decision-making process. Ask them about their preferences, style, and color choices. This ensures that their room feels like a reflection of their personality and provides a comfortable environment when they visit. 2. Choose Versatile Colors Select versatile colors that can adapt to different design styles and moods. Neutral tones like soft grays, warm beiges, or muted blues work well as a foundation for the room. These colors provide a timeless backdrop for various decor choices. 3. Create a Functional Space College life often requires a functional and organized space. Consider incorporating features like built-in storage, a study area, or a cozy reading nook into the room’s design. These additions can help your child stay organized and focused. 4. Incorporate Personal Touches Encourage your child to personalize their space with wall art, posters, or decorative items that reflect their interests and hobbies. These personal touches can make the room feel like their own sanctuary. 5. Upgrade Furniture If your child’s room includes furniture that has seen better days, consider upgrading key pieces like the bed, desk, or chair. Look for furniture that is both comfortable and functional for studying and relaxation. 6. Coordinate Bedding and Decor Coordinate bedding and decor items like curtains, throw pillows, and rugs with the room’s color scheme. This creates a cohesive and inviting atmosphere. Opt for quality bedding that ensures a comfortable night’s sleep. 7. Consider Flexibility Keep in mind that your child’s preferences may evolve over their college years. Choose design elements that offer flexibility, making it easy to update the room as their tastes change. Removable wallpaper or decals can be an excellent choice. 8. Lighting Matters Proper lighting is essential for studying and relaxing. Ensure that the room has adequate task lighting for studying and reading, as well as ambient lighting for a cozy atmosphere. 9. Showcase Achievements Create a space where your child can showcase their achievements, whether it’s academic awards, artwork, or sports trophies. Display shelves or a dedicated wall area can be used for this purpose. 10. Preserve Memories Consider creating a memory wall or photo collage featuring pictures from your child’s school years and memorable moments. This adds a sentimental touch to the room and provides a sense of continuity. Conclusion Freshening up your college-bound kid’s room with paint and thoughtful design choices can make their transition to college life smoother and more enjoyable. By creating a space that reflects their evolving tastes, provides functionality, and offers a warm welcome, you’ll ensure that their room remains a comforting and cherished part of their homecoming experience. CONTACT US NOW
Prepping Your Patio for Party Time: Exterior Painting Tips
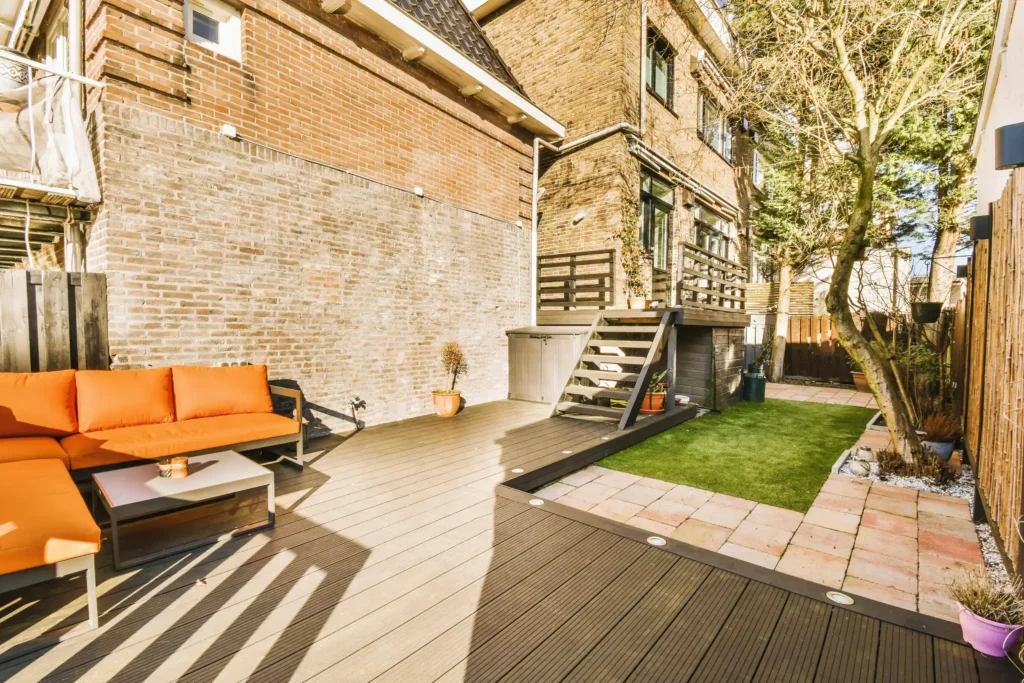
BLOG POSTS Prepping Your Patio for Party Time: Exterior Painting Tips Sponsored by: E&S Contractor Painting Company As the weather warms up, your outdoor patio becomes a prime gathering spot for friends and family. To ensure your patio is ready for outdoor parties and gatherings, a fresh coat of paint can work wonders. In this article, we’ll explore exterior painting tips that will help you transform your patio into the perfect party destination. 1. Choose the Right Paint When painting your patio, it’s essential to choose the right type of paint. Exterior paints are specially formulated to withstand outdoor conditions, including exposure to sunlight, rain, and temperature fluctuations. Opt for high-quality, weather-resistant paint to ensure long-lasting results. 2. Clean and Prepare the Surface Before you start painting, thoroughly clean and prepare the surface. Remove dirt, dust, mildew, and any loose or peeling paint. You may need to use a pressure washer or a scrub brush and a mild detergent to clean the patio surface effectively. 3. Repair and Patch Inspect your patio for any cracks or holes in the concrete or wood. Use an appropriate patching compound to fill in these imperfections and ensure a smooth and even surface. Allow the patches to dry completely before painting. 4. Prime if Necessary In some cases, particularly if you’re painting a previously unpainted surface or making significant color changes, using a primer may be necessary. A primer helps the paint adhere better and ensures an even finish. Consult with a paint professional to determine if primer is needed for your project. 5. Use the Right Tools Invest in high-quality paintbrushes, rollers, and extension poles suitable for outdoor painting. These tools will make the painting process smoother and more efficient. Consider using a paint sprayer for large patio areas for a more even application. 6. Test Paint Samples Before committing to a color, test paint samples on a small, inconspicuous area of your patio to see how they look in outdoor lighting. Colors can appear different outdoors than they do indoors, so it’s essential to ensure you’re happy with the choice. 7. Plan for Dry Weather Schedule your painting project during a period of dry weather with mild temperatures. Avoid painting on extremely hot or windy days, as these conditions can affect the paint’s application and drying process. 8. Protect Surrounding Areas Cover any plants, furniture, or fixtures near the patio to protect them from paint splatter. Use drop cloths or plastic sheeting to shield these items from accidental spills. 9. Apply Multiple Coats For a durable and long-lasting finish, consider applying multiple coats of paint. Follow the manufacturer’s recommendations for drying times between coats. This extra effort will ensure a robust and resilient surface. 10. Allow Ample Drying Time After the final coat of paint, allow ample time for drying before placing furniture or hosting parties on your patio. Rushing this step can lead to paint damage and imperfections. 11. Regular Maintenance To keep your patio looking its best, perform regular maintenance, including cleaning and touch-up painting as needed. This will help prolong the life of your patio’s paint job and keep it party-ready. Conclusion With the right exterior painting techniques, your patio can become the ultimate party destination. Whether you’re hosting barbecues, outdoor dinners, or casual gatherings, a freshly painted patio can enhance the ambiance and set the stage for memorable moments with family and friends. So, roll up your sleeves, choose your favorite outdoor paint colors, and get ready to transform your patio into the perfect party spot. CONTACT US NOW
Creating a Gourmet Look: Painting Tips for Food Lovers

BLOG POSTS Creating a Gourmet Look: Painting Tips for Food Lovers Sponsored by: E&S Contractor Painting Company The kitchen is often considered the heart of the home, and for food lovers, it’s a place of creativity and joy. If you’re passionate about cooking and want to infuse your kitchen with a gourmet look, painting can be a transformative tool. In this article, we’ll explore painting tips and techniques that will help you achieve a gourmet-inspired kitchen that’s both stylish and functional. 1. Elegant Neutrals Start by selecting an elegant neutral color palette for your kitchen. Shades of white, cream, beige, and light gray create a timeless and sophisticated backdrop. These neutral tones allow your culinary creations and kitchen decor to take center stage. 2. Accent Wall Consider creating an accent wall in your kitchen to add a pop of color or texture. You can choose a deep, rich hue, such as a deep burgundy, navy blue, or even a textured wallpaper, to draw attention to a specific area like the cooking or dining area. 3. Cabinet Makeover Transform your kitchen cabinets with a fresh coat of paint. Opt for classic colors like muted blues, greens, or soft grays to achieve a gourmet-inspired look. Don’t forget to replace cabinet hardware with sleek and modern handles or knobs for a polished finish. 4. Open Shelving If you have open shelving in your kitchen, consider painting the wall behind the shelves with a contrasting color or a bold pattern. This can make your kitchen items, such as cookware and dishware, stand out as decorative elements. 5. Faux Finishes Experiment with faux finishes to add texture and depth to your kitchen walls. Techniques like faux marble, faux wood, or Venetian plaster can create a luxurious and gourmet atmosphere. 6. Kitchen Island Focus If you have a kitchen island, make it the focal point of the room. Paint it with a distinctive color that complements the rest of the kitchen. This can create a sense of contrast and visual interest. 7. High-Gloss Elements Introduce high-gloss finishes to certain elements in your kitchen, such as the backsplash or a feature wall. High-gloss paint reflects light beautifully and adds a touch of glamour to the space. 8. Personalized Chalkboard Consider adding a chalkboard wall or section in your kitchen where you can write daily menus, grocery lists, or inspirational quotes. It’s a functional and creative addition that can enhance the gourmet experience. 9. Lighting Accents Coordinate your paint choices with the lighting in your kitchen. For instance, if you have elegant pendant lights or chandeliers, ensure that the color palette complements the fixtures, creating a cohesive and luxurious look. 10. Professional Advice When in doubt, seek the advice of a professional interior designer or a local painting contractor. They can provide expert guidance on color selection, finishes, and techniques to achieve the gourmet look you desire. Conclusion For food lovers, the kitchen is not just a place to cook; it’s a canvas for culinary artistry. By applying these painting tips and techniques, you can create a gourmet-inspired kitchen that’s not only visually appealing but also a joy to cook and dine in. Transform your kitchen into a space that reflects your passion for food and elevates your culinary experience to a whole new level. CONTACT US NOW
Tween to Teen Room Makeovers: Creative Painting Ideas
BLOG POSTS Tween to Teen Room Makeovers: Creative Painting Ideas Sponsored by: E&S Contractor Painting Company Decorating a room for a tween or teen can be a fun and creative endeavor. These transitional years are an ideal time to involve your child in the design process and give them a space that reflects their personality and interests. In this article, we’ll explore creative painting ideas for tween to teen room makeovers that can transform their space into a stylish and comfortable haven. 1. Accent Walls One of the simplest yet most effective ways to infuse character into a room is by creating an accent wall. Encourage your tween or teen to choose a bold color or a unique pattern for one wall while keeping the others neutral. This focal point can serve as a backdrop for art, posters, or decorative items. 2. Chalkboard and Whiteboard Paint Consider applying chalkboard or whiteboard paint to a section of the room. This provides a creative outlet for doodling, note-taking, and self-expression. It’s not only functional but also adds an interactive and dynamic element to the room. 3. Ombre Walls Ombre walls create a stunning gradient effect that can add depth and visual interest to a room. Work with your child to select a color palette that transitions from light to dark or vice versa. This style adds a touch of sophistication to the space. 4. Stripes and Patterns Painting stripes or geometric patterns on the walls can be a playful way to introduce design elements. Stripes can be horizontal, vertical, or even diagonal, depending on the desired effect. Use painter’s tape to achieve clean, sharp lines. 5. Stencils and Murals Consider using stencils to create intricate designs or murals that reflect your child’s hobbies, interests, or favorite themes. From sports motifs to nature scenes, the possibilities are endless. Stencils and murals allow for personalization and customization. 6. Two-Tone Walls Experiment with two-tone walls by dividing the wall horizontally or diagonally and painting the upper and lower sections different colors. This technique can add visual appeal and a unique touch to the room. 7. Glow-in-the-Dark Paint For an element of surprise and fun, you can incorporate glow-in-the-dark paint into the room’s design. Apply it to stars on the ceiling, wall art, or other decorative elements. It creates a magical ambiance at night. 8. Color Blocks Create defined color blocks on the walls by using painter’s tape to mask off sections. This method allows for the incorporation of multiple colors in an organized and visually appealing way. 9. Customized Wall Art Encourage your tween or teen to express their creativity by painting their own wall art. Canvas or framed artwork can be personalized to match the room’s color scheme and style. 10. Texture and Faux Finishes Experiment with textured paint or faux finishes to add depth and dimension to the walls. Techniques like sponge painting, ragging, or stippling can create unique and tactile surfaces. Conclusion A tween or teen’s room is more than just a place to sleep; it’s a sanctuary where they can relax, study, and express themselves. By incorporating creative painting ideas into the room’s design, you can create a space that reflects your child’s personality and interests. These painting techniques offer an opportunity for collaboration and self-expression, ensuring that the room truly becomes their own. CONTACT US NOW
Healthy Home, Healthy Life: Choosing the Best Paint for Your Space

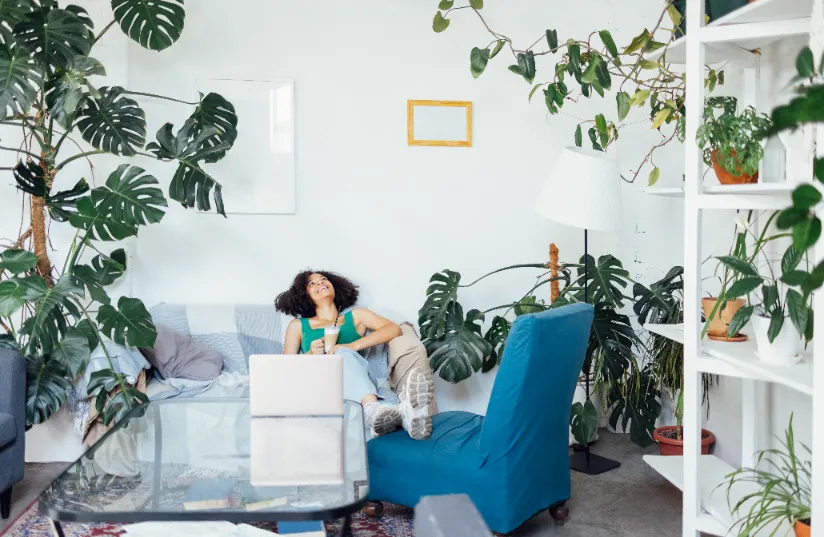
BLOG POSTS Healthy Home, Healthy Life: Choosing the Best Paint for Your Space Sponsored by: E&S Contractor Painting Company Your home is not just a place to live; it’s also a sanctuary for your well-being. When it comes to creating a healthy living environment, the choice of paint can play a significant role. In this article, we’ll explore the importance of selecting the best paint for your space to promote a healthy home and lifestyle. The Impact of Paint on Indoor Air Quality Did you know that the type of paint you use can affect the air quality inside your home? Many conventional paints contain volatile organic compounds (VOCs) that can release harmful fumes into the air, leading to indoor air pollution. Prolonged exposure to VOCs can cause health issues, including respiratory problems and allergic reactions. Choosing Low-VOC or Zero-VOC Paint To create a healthier living space, consider using low-VOC or zero-VOC paint. These paints contain significantly lower levels of VOCs, making them a safer choice for you and your family. They are also more environmentally friendly. When shopping for paint, look for labels indicating low or zero-VOC content. Benefits of Low-VOC and Zero-VOC Paint Improved Indoor Air Quality: Low-VOC and zero-VOC paints release fewer harmful chemicals into the air, leading to better indoor air quality. This is especially important for those with allergies, asthma, or other respiratory conditions. Reduced Odor: These paints have a milder, less overpowering odor compared to traditional paints, making the painting process more comfortable. Eco-Friendly: By choosing environmentally friendly paints, you contribute to reducing the environmental impact of paint production and disposal. Long-Lasting Beauty: Low-VOC and zero-VOC paints provide the same durability and long-lasting finish as traditional paints, so you don’t have to compromise on quality. Other Considerations When Choosing Paint While VOC content is a crucial factor, there are other considerations when selecting paint: Finish: Choose the right finish for each room. For example, satin or eggshell finishes are easy to clean and work well in high-traffic areas, while matte finishes can create a cozy atmosphere in bedrooms. Color: Consider the psychological impact of color on mood. Soft, calming colors can promote relaxation, while brighter colors can add energy to a space. Paint for Specific Surfaces: Different surfaces, such as walls, ceilings, and trim, may require different types of paint. Ensure you choose the appropriate paint for each surface to achieve the best results. Brand and Quality: Opt for reputable paint brands known for their quality and commitment to eco-friendly products. Quality paint can result in a longer-lasting and more satisfying finish. Conclusion Your home should be a place of comfort and well-being, and selecting the right paint can contribute to a healthier living environment. By choosing low-VOC or zero-VOC paint, you can improve indoor air quality, reduce exposure to harmful chemicals, and create a safer and more eco-friendly home. Take the time to research paint options, consult with professionals, and make informed choices that promote a healthy home and a healthy life. CONTACT US NOW